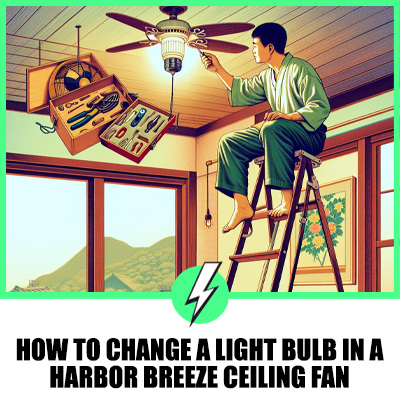
How to Change a Light Bulb in a Harbor Breeze Ceiling Fan
Need to swap out the light bulb in your Harbor Breeze ceiling fan but worried it’s too complex?
Fear not, as this guide is designed to demystify the process, making it accessible and manageable for anyone. Whether you’re addressing a dim room due to a burnt-out bulb or aiming to refresh the ambiance with a new lighting vibe, the steps outlined here will ensure a smooth transition to brighter, more inviting spaces.
Well, we’ll be going over:
- How can you ensure your safety before starting the bulb replacement process?
- What are the key steps to properly removing and identifying the right type of bulb for your fan?
- How can you efficiently reassemble the light fixture to bask in your newly illuminated space?
Let’s dive in.

Contents
Turn Off the Power
Before you start working on your Harbor Breeze ceiling fan, safety should be your top priority. The first step in ensuring a safe environment for changing the light bulb is to Turn Off the Power.
This might seem like an obvious step, but it’s crucial for preventing any electrical accidents. Turn off the wall switch that controls the fan.
Then, to be extra cautious, head to your home’s circuit breaker or fuse box and locate the switch that controls the power to your ceiling fan. Flip it to the off position.
After you’ve turned off the power, it’s wise to double-check that it is indeed off. You can do this by turning on the wall switch you previously turned off.
If the fan or any lights in the room don’t turn on, you’ve successfully cut off the power. Remember, taking these precautions not only protects you but also your ceiling fan from potential damage during the light bulb change.
Remove the Light Cover
Once you’ve ensured the power is off, the next step in changing the light bulb in your Harbor Breeze ceiling fan is to remove the light cover.
This is where having the right tools at hand can make a big difference. Typically, a screwdriver or a simple push and twist motion may be required, depending on the fan model.
Start by gently holding the light cover and identifying if there are screws securing it. If screws are present, use a suitable screwdriver to loosen them. Be careful not to strip the screws by turning them too hard.
If your model has a cover that requires a push and twist method, hold the cover firmly and turn it counterclockwise. This should release the cover, allowing you to access the bulb.
Remember, every ceiling fan model might have a slightly different method for removing the light cover.
If you’re unsure or the cover doesn’t seem to budge, it’s wise to refer to the user manual for specific instructions related to your Harbor Breeze model. This ensures you don’t accidentally damage the cover or fan trying to figure it out.
Identify the Bulb Type
Once you’ve successfully removed the light cover from your Harbor Breeze ceiling fan, it’s imperative to identify the bulb type before proceeding to purchase a replacement.
Harbor Breeze fans typically use a range of bulbs, from standard incandescent to more energy-efficient LEDs and compact fluorescents (CFLs).
Firstly, examine the socket. You’ll often find the bulb type printed or embossed around it. Look out for notations like “LED,” “CFL,” or specific numbers indicating the bulb wattage and base type, such as E26 or E12.
If there’s no clear indication on the socket, the manual that came with your ceiling fan could be your next best bet. It usually lists recommended bulb types and wattages which are optimal for your model.
Additionally, take note of the bulb’s shape and size. Some Harbor Breeze ceiling fans necessitate bulbs with unique shapes or base types to fit snugly within the fixture without overheating issues.
Here’s a quick rundown of common bulb types found in Harbor Breeze fans:
| Bulb Type | Base Type | Typical Wattage |
|---|---|---|
| LED | E26 | 9-12W |
| CFL | E26 | 13-15W |
| Incandescent | E12 | 40-60W |
Selecting the correct bulb ensures not only the right fit but also compatibility with your fan’s electrical system. Opting for LED bulbs offers the additional advantage of energy savings and a longer lifespan, making them a popular choice among homeowners.
Replace the Bulb
Once you’ve identified the correct bulb type for your Harbor Breeze ceiling fan, it’s time to replace the old bulb.
Safety first: ensure the fan and light are turned off and have cooled down before proceeding. You’ll need a sturdy step ladder to reach the fan comfortably.
Gently remove the existing bulb by twisting it anti-clockwise. If it’s a bayonet mount, push down slightly before turning. For screw bases, simply unscrew the bulb. Be cautious not to apply too much force which could damage the socket.
Next, take your new bulb, checking again that it matches the specifications you’ve identified earlier. For screw-in types, position the bulb in the socket and twist clockwise until snug.
For bayonet mounts, insert the bulb into the socket, push down, and then turn clockwise until it locks into place.
Before reassembling the light cover, give the new bulb a quick test by turning on the power. This ensures everything is working correctly before you finalise the installation.
Remember, while handling the bulb and fan components, it’s important to be mindful of their fragility to avoid any accidental damage.
This simple step-by-step process doesn’t just brighten your room; it extends the life and performance of your Harbor Breeze ceiling fan, ensuring it remains a focal point of comfort in your home for years to come.
Reassemble the Light Fixture
Once the new bulb is securely in place, it’s time to Reassemble the Light Fixture on your Harbor Breeze ceiling fan. Start by carefully positioning the light cover over the bulb.
Ensure it aligns perfectly with the mounting points. Holding the cover gently, rotate it in the direction opposite to how you removed it. This action will lock the cover back into its position.
Next, if your ceiling fan’s light fixture involves screws or clips for securing the cover, reattach them now. Do so with care, as over-tightening could crack the cover or strip the screws making future maintenance challenging. Always remember, the goal is to secure the cover firmly but delicately.
Testing the light once everything is back in place is crucial. Switch the power back on and turn on the fan’s light.
This step is not just about ensuring the new bulb works. It’s also about confirming that the reassembly was done correctly, ensuring there are no loose parts or gaps in the fixture.
Conclusion
Changing a light bulb in your Harbor Breeze ceiling fan might seem daunting at first but with the right guidance, you’ve seen it’s quite manageable. Remember, safety first by ensuring the fan is off and cooled down.
Handling the components with care and reassembling everything correctly are key steps you shouldn’t overlook. By avoiding common mistakes like over-tightening, you’ll ensure your fan’s longevity.
Testing the light after reassembly confirms you’ve done everything right. Armed with this knowledge, you’re now more than capable of tackling this task with confidence.


