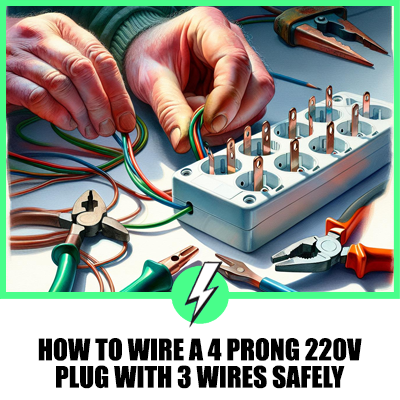
How to Wire a 4 Prong 220V Plug with 3 Wires Safely
Wondering how to wire a 4-prong 220v plug with just 3 wires?
It might sound complex, but with a clear guide, it’s a task you can confidently tackle. Whether it’s for a home project or setting up a new appliance, understanding the basics of wiring is crucial.
This introduction will simplify the process, focusing on safety and effectiveness, to get your devices running smoothly.
Well, we’ll be going over:
- How do you prepare and gather the necessary tools and materials for the job?
- What are the steps to correctly identify and connect the X, Y, and Z wires to their respective terminals?
- How can you ensure a secure and safe ground connection to complete the wiring?
Let’s dive in
Contents
Gather the Required Tools and Materials
Before diving into the wiring process, it’s essential to have all your tools and materials ready. Preparing in advance ensures a smoother operation and reduces the risk of interruptions. Here’s what you’ll need:
- Wire strippers: Essential for removing the insulation from your wires without damaging them.
- Screwdriver: Necessary for securing connections in the plug.
- Electrical tape: Provides additional safety by insulating connections.
- 4-prong 220v plug: The main component for this project.
- 3-wire cable: The specific type depends on your appliance’s requirements.
Remember, choosing the right tools and materials not only facilitates a successful project but also guarantees safety throughout the process.
Ensure your wire gauge matches the specifications of your appliance and plug to prevent any electrical mishaps. Keeping these tools at hand will streamline the wiring process, making it efficient and hassle-free.
Identify the Wires: X, Y, and Z
When wiring a 4-prong 220v plug with 3 wires, it’s crucial to understand the role and identification of each wire. Typically, your 3-wire cable will have one red (X), one black (Y), and one white (Z) wire, along with a bare or green grounding wire.
The red and black wires serve as hot wires, each carrying 110v to supply the 220v total that appliances, such as dryers and ranges, require.
Let’s dive deeper:
- X (Red Wire): Acts as a hot wire. In the 4-prong setup, it connects to one of the prongs that serve a hot function.
- Y (Black Wire): Similar to the red wire, this also serves as a hot wire and connects to the other prong designated for a hot connection.
- Z (White Wire): Traditionally, the white wire acts as the neutral in most electrical installations. However, in a setup with only three wires and lacking a dedicated neutral, it’s repurposed to serve as either a neutral or ground depending on the specific requirements of the appliance and local electrical codes.
Remember, the absence of a dedicated neutral wire in a 3-wire setup makes it all the more important to ensure that connections are made safely and in accordance with local regulations.
Always consult with a professional or refer to the electrical code in your area if you’re unsure.
Connect the X Wire to the ‘X’ Terminal
When wiring a 4-prong 220v plug with only three wires, identifying and connecting the X wire correctly is crucial.
The X wire, typically the red wire, serves as one of the hot wires and must be attached to the correct terminal to ensure the safety and functionality of your electrical setup.
Firstly, locate the terminal on the plug marked as ‘X’. It’s essential to ensure that the power is turned off at your circuit breaker to prevent any electrical accidents.
Once you’ve confirmed that the area is safe to work in, strip the end of your red or X wire, exposing enough copper to make a secure connection.
Gently twist the strands of the copper together, creating a clean, compact wire end. Insert this end into the ‘X’ terminal and tighten the screw firmly.
A solid connection is paramount for the transfer of electrical currents without resistance or overheating.
Remember, the integrity of your electrical connections directly affects the performance and safety of your appliances.
Before proceeding to the next step, double-check that the X wire is securely attached and that there’s no exposed wire outside the terminal, which could lead to a short circuit.
Connect the Y Wire to the ‘Y’ Terminal
After securing the X wire, it’s time to focus on the Y wire, often known as the black wire in many cases. This step is crucial for ensuring your 4-prong 220v plug operates smoothly and safely.
Initially, make sure the power source is still off to prevent any potential accidents. Then, strip the insulation off the Y wire, revealing about 3/4 inch of the conductor.
When connecting the Y wire, attention to detail is key. This wire should be attached to the ‘Y’ terminal on your plug. Just like with the X wire, ensuring a firm and secure connection is vital for the safety and functionality of your plug.
Twist the wire around the terminal screw and tighten it until it’s snug. You’re looking for a connection that won’t move or come loose with vibration or over time.
Double-check your work up to this point. A loose or incorrect connection could lead to serious electrical hazards. Your diligence in following these steps closely is essential for a successful installation.
Connect the Z Wire to the Ground Terminal
After securing the Y wire to its rightful place, it’s time to focus on the Z wire, typically the bare copper or green wire in your setup.
This wire is crucial for your safety, serving as the ground connection. Grounding is fundamental in preventing electrical shocks and ensuring the plug operates safely.
Firstly, ensure the power remains off to avoid any hazardous situations. Locate the ground terminal on your 4-prong 220v plug, usually marked with a green screw or identified as ‘GND’.
It’s imperative that you connect the Z wire directly to this terminal. Strip the wire, if it’s not already prepared, to expose approximately 3/4 inch of bare wire. Twist the strands tightly together to make them easier to connect.
When connecting, ensure the wire wraps securely around the terminal screw in a clockwise direction. This orientation ensures that tightening the screw will also tighten the wire’s grip, enhancing the connection’s stability.
Once positioned, tighten the screw firmly with a screwdriver. Your connection should be strong and secure with no loose strands.
By establishing a robust ground connection, you’re significantly reducing the risk of electrical faults and enhancing the overall safety of your electrical system.
Conclusion
Wiring a 4-prong 220v plug with 3 wires might seem daunting at first but with the right guidance, it’s a task you can confidently tackle. Remember, the key to a safe and effective installation lies in properly grounding the plug.
This not only safeguards against electrical shocks but also significantly minimises the risk of electrical faults.
By following the steps outlined, you’ve not just enhanced the safety of your electrical system but also ensured its reliability for years to come. So, whenever you’re ready to wire or rewire, you’ve got the knowledge to do it right.