How to Safely Wire a Light Switch to a GFCI Outlet
Wiring a light switch to a GFCI outlet might seem complex, but it’s a DIY task that can significantly enhance the safety and convenience of your home.
Especially relevant in areas prone to moisture, like bathrooms and kitchens, this setup protects against electrical hazards. Ready to dive into this home improvement project?
Let’s break down the process and equip you with the know-how to safely wire a light switch to a GFCI outlet.
Well, we’ll be going over:
- What are the key considerations when working with GFCI outlets, and why are they so crucial in certain areas of your home?
- What tools and materials will you need to ensure a smooth and safe installation process?
- How do you properly wire a light switch to a GFCI outlet to enhance both safety and functionality in your living space?
Let’s dive in.

Contents
Understanding the Basics of GFCI Outlets
GFCI, or Ground Fault Circuit Interrupter outlets, are crucial in modern homes, especially in areas prone to moisture such as bathrooms, kitchens, and outdoor spaces.
These outlets monitor the flow of electricity in a circuit. If they detect an imbalance, they immediately shut off power, reducing the risk of electric shock.
Installing a GFCI outlet offers an added layer of safety. It’s not just a regulatory requirement; it’s a proactive step to safeguard your family and home from potential electrical hazards.
When you wire a light switch to a GFCI outlet, you’re extending this protection to the lighting circuit, ensuring that any electrical anomalies can be quickly managed without putting anyone at risk.
Remember, while doing this yourself is rewarding, understanding the wiring protocol is key. Always ensure the power is off before starting any electrical work and consult a professional if you’re unsure.
Tools and Materials Needed
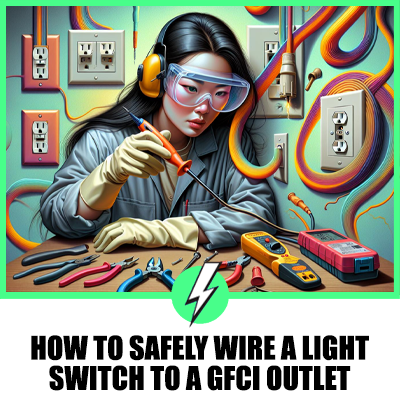
Before diving into the task of wiring a light switch to a GFCI outlet, it’s crucial you gather all necessary tools and materials. This preparation step ensures a smooth and efficient installation process. Here’s what you’ll need:
- Screwdrivers: A flathead and a Phillips-head screwdriver will be indispensable for removing and securing screws.
- Wire Strippers: To strip the insulation from the wires without damaging them.
- Voltage Tester: An essential safety tool to confirm the power is off before you start working.
- Electrical Tape: For insulating connections and marking wires.
- GFCI Outlet: Ensure it’s rated for the correct amperage and voltage for your specific installation.
- Light Switch: Compatible with your home’s electrical system.
- Electrical Wire: Enough length to comfortably connect the light switch to the GFCI outlet.
- Wire Connectors: To safely join wires together.
Gathering these items before you start will streamline the installation process. Remember, working with electricity requires attention and precision to ensure everything is done safely and correctly.
Wiring a Light Switch to the GFCI Outlet
When wiring a light switch to a GFCI outlet, safety is paramount. First, ensure the power is completely turned off at the breaker. Use your voltage tester to verify this. This step is critical to avoid electric shock.
Begin by removing the faceplate from the GFCI outlet and unscrewing it from the box. Carefully pull it out to expose the wiring.
Identify the line and load terminals on the outlet. The power coming from the service panel connects to the line terminals. These are your primary focus for integrating the light switch.
You’ll wire the light switch in between the GFCI’s line and load terminals. Connect a wire from the line terminal to the light switch.
Then, run another wire from the other terminal on the switch back to the load terminal on the GFCI outlet. This configuration allows the GFCI to protect the light switch, enhancing safety.
Securely fasten all wires with wire connectors and ensure there are no loose strands. Wrap exposed connections with electrical tape for additional insulation and protection.
Testing and Troubleshooting
Once you’ve wired the light switch to the GFCI outlet, it’s crucial to test your setup to ensure everything functions correctly.
Begin by turning the power back on at the breaker. Then, press the “Reset” button on the GFCI. This step is vital; if the outlet doesn’t reset, it may indicate an issue with your wiring connections.
Next, use a voltage tester on the light switch. If there’s no voltage reading, double-check the connections between the light switch and the GFCI’s LOAD terminals.
A common troubleshooting step involves ensuring that the wires are securely attached and that none of the insulation is caught under the terminal screws.
If the GFCI trips immediately or the light doesn’t turn on, inspect for any short circuits or wrongly connected wires.
Remember, the LINE terminals of the GFCI supply power, while the LOAD terminals connect to devices like your light switch that you wish to protect. Correctly identifying and connecting these is pivotal.
Testing and troubleshooting might require patience, but they’re key steps to safeguard your setup’s functionality and safety.
Safety Precautions to Keep in Mind
When wiring a light switch to a GFCI outlet, prioritizing safety is crucial. Before you start, ensure the power is off.
Use a voltage tester to confirm there’s no current flowing in the circuit you’re working on. Never assume the electricity is off without checking; this simple step can prevent electric shocks.
Wear protective gear such as rubber gloves and safety goggles. These can protect you against unexpected arcs or sparks that might occur during the process.
Keep your tools and work area dry. Working with electrical components near water increases the risk of electrocution.
If you’re installing a light switch in an area prone to moisture, like bathrooms or kitchens, the importance of a GFCI becomes even more pronounced.
Lastly, be familiar with your local electrical codes. These regulations are in place for your safety and ensure that your installation is legal and safe. If there’s any doubt, consult with a professional electrician to review your work.
Conclusion
Wiring a light switch to a GFCI outlet requires meticulous attention to safety and adherence to local electrical codes.
Remember to always turn off the power and verify with a voltage tester before starting. Protective gear is a must to ensure your safety during the process.
Given the GFCI’s crucial role in moisture-prone areas, it’s paramount to understand its importance in safeguarding your home against electrical hazards. If you’re ever in doubt, don’t hesitate to seek advice from a professional electrician.
By following these guidelines, you’ll not only enhance the safety of your home but also ensure the job is done correctly and efficiently.


