How To Check If Cable Outlet Is Active
According to one report published in December 2020, the number of British households that rely on cable television is about 3.82 million. Given such a large number of cable TV users, the possibility of running into a problem is also high.
Most people assume that the TV settings are wrong when they run into cable TV problems. Some also believe that the problem lies with the TV aerial that is the root of the issue.
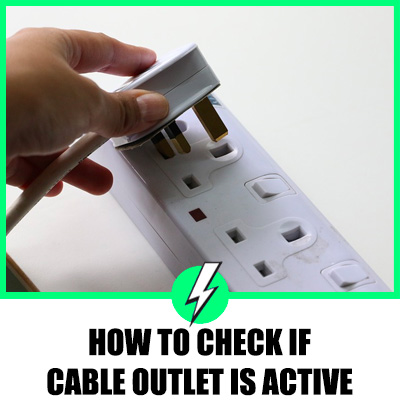
However, in many instances, it is the coax cable that is gone dead. Or parts of it may be. Coaxial cable is the wire that feeds the receiver of the TV. Furthermore, the outlet of the cable may not be functioning correctly. In such instances, you might want to check if the cable outlet is active or not.
There are a couple of ways to check if the cable outlet is active or not.
Contents
Testing if the cable outlet is active or not – A step by step guide
Tracing and check the cable
Tracing and locating where the cable wire terminates is a bit tricky. This is usually at the splitter on a wall somewhere or a distribution panel. In most cases, a disconnected cable from the distribution panel is the problem.
If so, screwing on the cable usually takes care of the issue. To do so, carefully screw on the short end of the cable to the wall jack. The other end, which is the longer one, goes into the corresponding post.
In addition, you might also want to check the coaxial adapter pin at the mouth of the cable. This pin can also become loose over time and cause the cable to malfunction. So you can correct it by pushing it in using a light but firm pressure.
At this point, you can inspect the testing unit. If the indicator light at the front of the testing panel is green, the cable is working fine. On the other hand, if the indicator light is red, the cable is faulty and needs immediate replacement. Furthermore, if the indicator light does not light up, then the connection is poor. So you need to make sure that the coaxial adapter is inserted firmly at both ends and check the settings panel.
How to test a cable outlet with a coax tester
Perhaps the easiest way to test a cable outlet is by using a coax tester. It is easier than using a multimeter since the two ends of the cable need not be in close proximity. This eliminates the need to trace the end of a coax cable and bring it to the test area.
To use the coax tester, you need to check if the battery is inserted correctly. These specialised testers run on batteries, which are supplied with the tester.
Next, plug in the test injector of the tester on one end of the cable. The other name of the injector is the speaker end. The tone generator goes into the end of the cable.
If the cable outlet is active, the tester emits a high-pitch signal on the tone generator side. Also, the other end will also light up. Depending on the model of the tester, some show a red light, while others show green.
Coax testers are very easy to use, and they are relatively affordable. One of our favourite coax testers is this one from Klein Tools. This tester carries a higher price tag than most, but it has fantastic features. It also comes with a remote that makes it even more convenient while tracing the cable.
If you want a more affordable option, this generic coax cable is the right choice. In addition to its wallet-friendly price, the tester has a range of 100 meters, which is impressive.
How to test a cable outlet with a multimeter
The next method to test a cable outlet is with a multimeter.
Here is a step-by-step guide.
Step 1. Setting up the multimeter
- Turn on the device and set it to a continuity test. In most multimeters, the continuity test shares the dial with resistance and bears the Ω symbol.
- The black probe goes into the common COM socket. Some multimeters also have a negative– symbol in the common socket.
- Next, the red probe goes into the socket marked with a positive+, Ω symbol, or kΩ symbol.
- With the test leads apart, the multimeter reading should be a zero or a near zero.
- To check if the test probes are working correctly, bring the metal leads and touch them. The reading should be near about zero. If your multimeter has the feature, it should also beep when you touch the metal tips together.
- You can also hold the metal tips in one hand and wiggle the test leads to ensure that the leads are in good working condition. The reading should remain steady throughout the process.
Step 2. Testing the cable
Disconnect the coax cables from the splitter and receiver at this point.
- Hold the test leads and bring them to the central connector or the pin on both ends of the cable. Take care to ensure that the tips do not touch the shield or the outer metal parts.
- Coax cables that are working fine will show a reading. In very short wires, the reading should be near about 2 to 3 ohms. And for longer cables, a reading of up to 20 ohms indicates that the cable is working. If your multimeter has the provision, it should also beep when the test leads touch the central pin.
- You can proceed to do the same for the shield or the connectors. The reading inference should be similar to when you test the central pins.
- Next, you can test continuity between the connector and the pin. This will determine if there is any short circuit in the cable.
- Here, you need to hold the test leads to the central pin and the connector or shield of one cable end simultaneously. If there is no short circuit on the coax cable, the reading should read open or a zero reading.
- You can continue the same process for all the cables at the splitter and the other end until you identify the faulty cable and replace it.