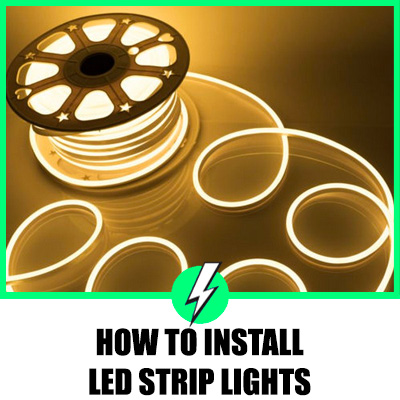
How to Install LED Strip Lights
When LED strip lights came into the market, it was a revolution. This strip of LED lights with adhesive backing has changed and made lighting easier, for different kinds of spaces and various types of purposes.
It’s very versatile and has changed the painstaking instalment of one by one lighting units to one whole strip. This is the reason why we can light up our gardens, kitchens, offices, and other areas much more comfortably, and can be used for both commercial and industrial purposes.
While the installation process of LED strip lights seems pretty straightforward, there are some essential things to know and keep in mind during the installation process.
This article will be a comprehensive guide about LED strip lights and how to install them.
Contents
What are LED strip lights?
LED strip lights, or also known as LED tape, are typically up to 5 meters in length. However, they could be cut to any desired length for the project at hand. These are light-emitting diodes that have semiconductors that serve as the passage of electricity. These semiconductors are small electrical components and do not rely on chemical reactions or heat, to produce light.
Also, because of the EU ban on halogen bulbs that came in 2018, the best lighting equipment that surpasses the halogen bulb, for different aspects, are LED strip lights.
These strip lights come with an adhesive backing that makes it versatile and applicable to all kinds of surfaces.
The benefits of LED strip lights
There are a lot of environmental, economic, and safety benefits of LED strip lights. We’ve listed them as below:
Environmental
- LED bulbs are more energy-efficient when compared to other kinds of bulbs.
- The circuit of LED bulbs is designed to convert energy to light and minimize the amount of heat that is emitted. LED bulbs work with low wattages, and thus, only consume a small amount of power to fulfil its purpose of providing light.
- LED lights work with low wattages, and consume low power, you are, indirectly, reducing your carbon footprint as you are reducing the usage of energy that is from the grid (non-renewable energy sources that are produced from the burning of fossil fuels).
Economic
- LED bulbs last longer than other kinds of bulbs (incandescent, halogen and fluorescent light bulbs). Because of this, you save money from replacements because of the long lifespan of the LED bulbs in your LED strip lights.
- Your LED bulb can last 50 times longer than your incandescent bulb, 20 times longer as a halogen bulb, and 10 times longer than a fluorescent lamp. This is approximately 50,000 hours of lifespan for one LED strip light.
- LED lights use a low amount of electricity, you will be saving your money when using them.
- In the UK, it is estimated by the UK Energy Saving Trust that you will be saving £35 a year when using LED lights.
Safety
- LED lights consume a low amount of energy and don’t produce much heat, they are safer than other forms of bulbs.
- LED lights are safe for outdoor use, as the outdoor version of LED lights is waterproof and wind-resistant.
- The amount of UV waves that are emitted by LED lights is at a small, safe amount, as compared to other bulbs that produce a high amount of UV waves.
How to install LED strip lights
Here is a step-by-step guide to installing LED strip lights.
Measure your desired lengths
The 5-meter LED strip light can be cut along the marked regular intervals. These intervals occur within approximately 10cm of each other. Position the end of the strip, so it’s near the hole you have drilled in your cabinet or cupboards. This makes it easier for concealing, or place the end near the connection to a power supply.
Understand the power supply
Your LED strip comes with a standard power supply that is provided for the exact purpose of lighting up your LED strip. While it is possible to use alternate power supplies, it may result in a mismatch of voltages that may overload the bulbs or a dimmer light output. It is best to consult the manufacturer for the LED lighting strip and its corresponding power supply.
Cut the strip
You should only cut at the designated interval marks, as these are the marks that make it safe to expose the wiring inside the strip. Interval marks vary according to the brand, type and manufacturer of your LED strip lights. These highlighted marks can clip the electricity, essentially holding power, and closing it off, for a complete circuit.
Cut them using a pair of scissors, and you should be good to go.
Apply the strip to your designated surface
All LED lighting strips come with a peel-off self-adhesive backing that makes it easy to apply to any types of surfaces. The peel-off support is one of the reasons why it is also called as LED tape, as it resembles some kinds of tape that also come with peel-off backing to expose the adhesive.
Be sure to decide how exactly you will lay down the tape on the desired surface. Clean off the surface first for maximum sticking, and then firmly press the LED lighting strip, with the adhesive side down, to your desired surface.
Installation of LED strip lights tips and tricks
Here are some problems that you may encounter, and our recommended solutions to them.
Applying for extra support
If you are applying the LED tape to a surface where gravity is more likely to cause the strip to come off, then, it is to your best interest to use additional adhesives. At the same time, the self-adhesive back that it comes with is meant to be sufficient in theory, it never hurts to add additional support.
You may use small amounts of hot glue to help tack the strip better, on regular intervals
Upgrading to better types of backing tape
There are some specific brands that offer better and more-adhesive backing tape. While this upgrade does come with an additional price, it certainly is worth it, especially if you need the adhesive to last as long as it could.
InStyle LED UK, for example, offers a higher-grade foam backing as an upgrade to their standard self-adhesive backings.
Use fixing clips
Fixing clips are generally tacks for your LED lighting strips. They can be screwed on either side of your strip so that it can hold it in place. This is a good option if you are working with surfaces that do not work well with adhesives.
How to solder LED strip lights
- The interval cut points will have 4 solder pads. These are in every cut point, and you will specifically look at the point where you’ve cut your LED strip light.
- The number solder pads differ for different types of LED tape. RGB LED tape has 8 solder pads, while RGBW has 10.
- Every single color will be marked with a (+) or (-) sign, or (+) R, G, B for RGB LED tape.
- You can connect the end of your LED lighting strip to wire it back to a transformer or a controller, by simply soldering them to the pads.
- When soldering two strips of LED tape together, be sure to cut halfway to the solder pads of each LED strip. Make sure to leave a half-circle on the solder pads. You can create whole circles by simply “butting” the pads together and soldering them.
What are LED strip light connectors?
If you are looking for an alternative to soldering, you can opt to use LED strip light connectors, instead. One key advantage of these connectors is that they will prevent possible damage and frustration that soldering brings.
LED strip light connectors are a great way to:
- Connect two strips together to create a longer strip
- Place a gap between two strips
- Connect power leads to the LED strip
- Create small connections when working in corners
There are specific types of LED strip lights for different purposes. There are 2-pin and 4-pin LED strip connectors.
- 2-pin LED strip connectors are for unicolor strips
- 4-pin RGB connectors have one positive line and have separate wires for red, green and blue LEDs
Each of these 2-pin and 4-lin connectors have strip-to-strip and strip-to-wire variations.
- Strip-to-strip connects two strips to form a longer strip
- Strip-to-wire connects a strip and a wire that may be connected to the power supply or to provide a gap and then connect to another strip line
How to connect LED lighting strip connectors
Here’s the steps to using an LED lightings trip connector:
- Lift the clear plastic back cover of the connector before sliding in the LED strip inside. Slide it back as far as it allows. It should hit the lowest tab of the connector.
- Once the strip is in place, push down the plastic tab to hold it in place.
- Push down the teeth and it should pierce the bottom of the copper pads. This will now make a complete, solid circuit.
This article was an overview of all information you need to know about LED strip lights, and how you can install them. We’ve also covered the connection process of the LED strip lights—from soldering to using connectors.